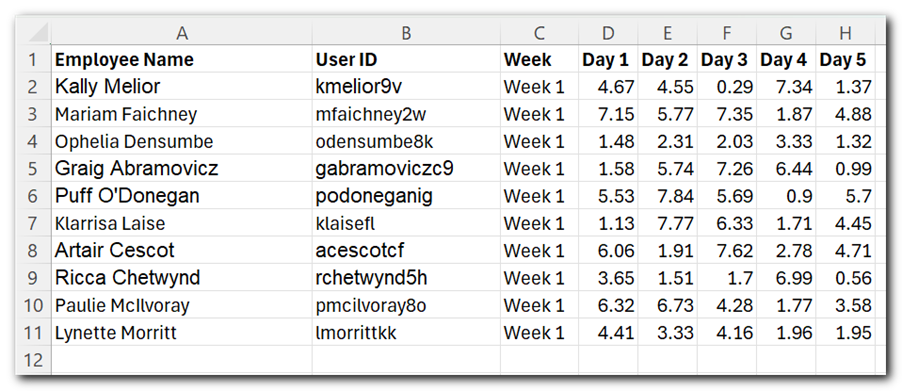


Welcome to a comprehensive guide of “write your first macro in Excel”. In this tutorial, we will take sample data, add formula, and finally format the data to make it neat and clean, like a professional report. All of these tasks will be recorded in a macro, and we will try to run the same code on other sheets as well. This may require a few changes to the code, we will try to find the issues with the code and try to fix them. The objective of this article is to give a start to our new developers and help them to understand how you can use VBA macros without much knowledge of programming.
Before we get into the technical stuff, let’s clarify what we’re aiming to do. Our goal is to make formatting data in Excel easier. This means making headers look the same, adding borders where needed, and calculating averages across different sheets. By automating these tasks with a macro, we can make our work more consistent and save ourselves a lot of time.
When working with macros, especially when recording. You need to ensure that wherever possible, you need to use Excel shortcuts. In this example, we have used Excel Shortcuts like Ctrl + Down to move the cell selection to the bottom or Ctrl + Shift + Down to select entire data. There are many other Excel shortcuts available which you can also use while recording the macro. You can fin the most use Excel Shortcuts at https://www.excelsirji.com/excel-shortcuts-keys/
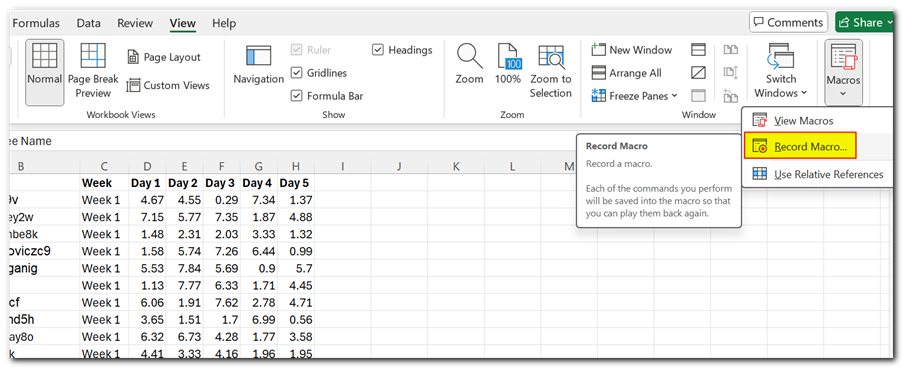
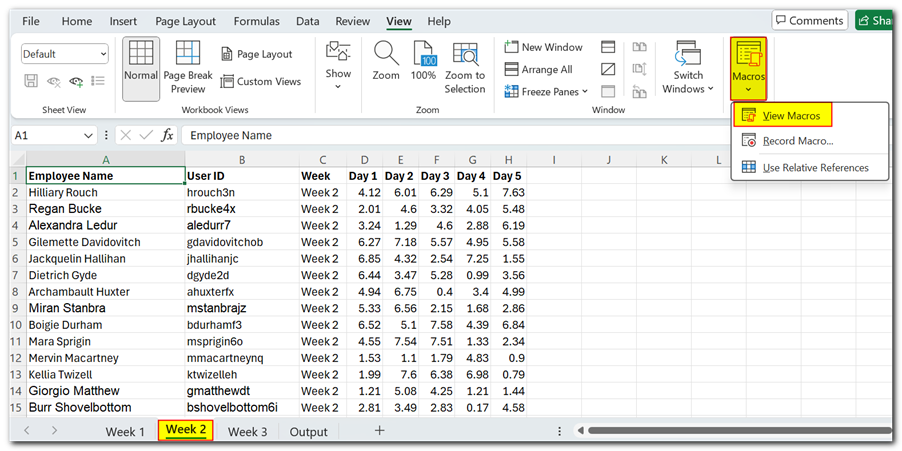
Let’s kick things off by recording our macro in Excel. Go to the “View” tab, click on “Macros,” and select “Record Macro.”
Give your macro a name, like “Format_Sheet” and choose a shortcut, such as “Ctrl + T”
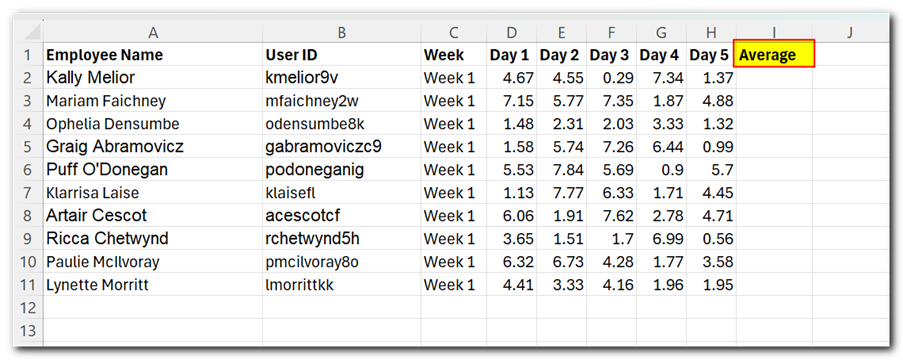
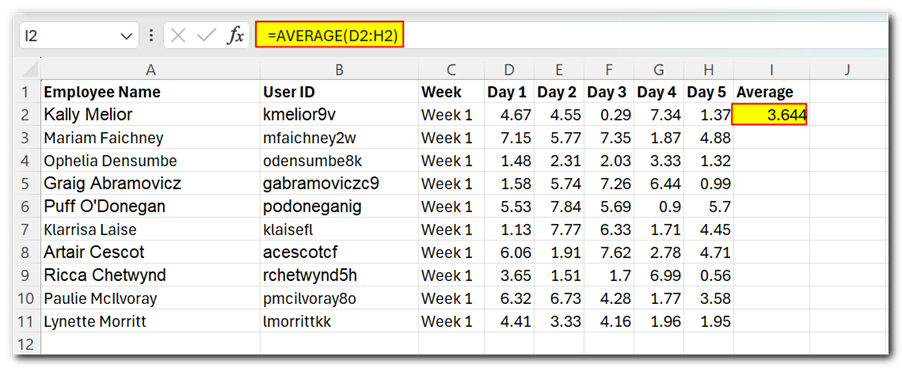
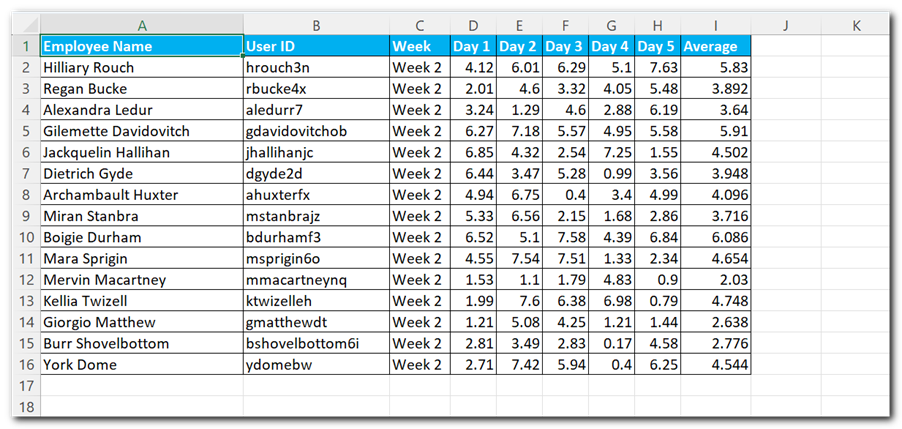
The very first thing we will record is to add average formula in the sheet. For that, we will select cell I1 and add header as ‘Average’.
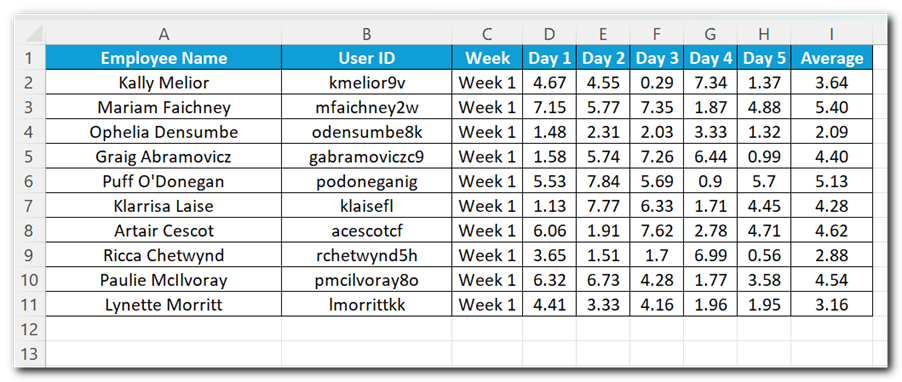
Let’s add the formula “=AVERAGE(D2:H2)” in cell I2. This will bring the average of Day 1 to Day 5 in average column.
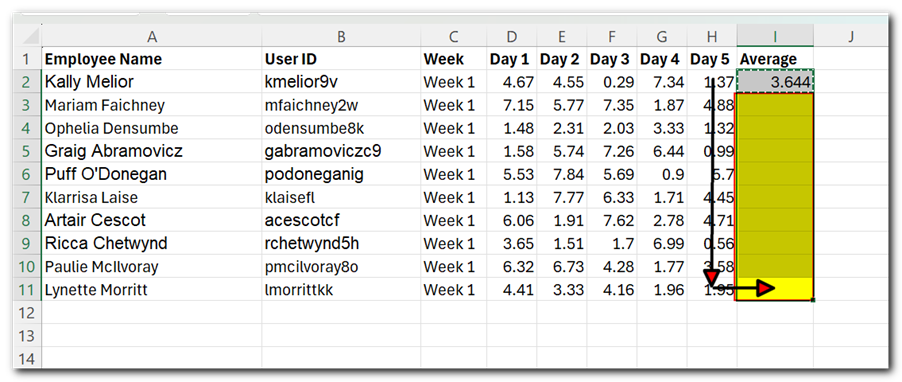
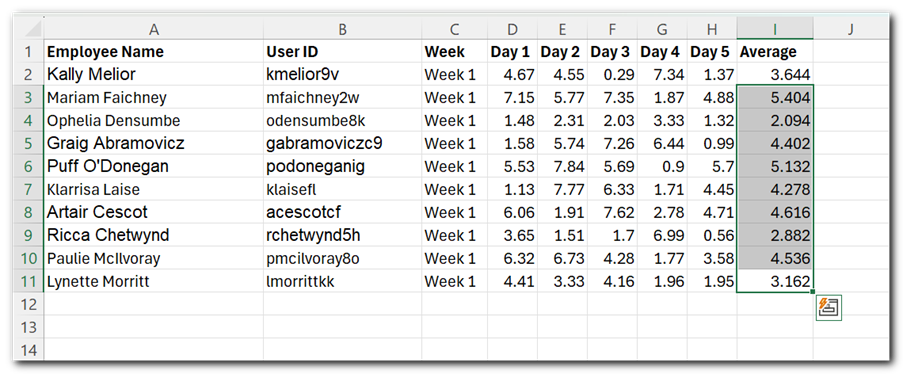
Drag the formula till the end of the data, here it is row 11. For this, we will first copy the formula and use Excel Shortcuts Ctrl + Down Key to go till the end of data.
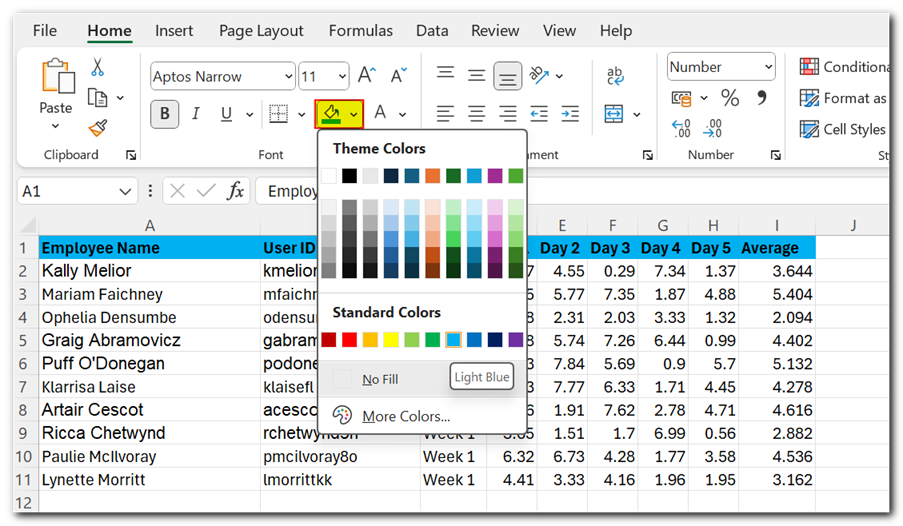
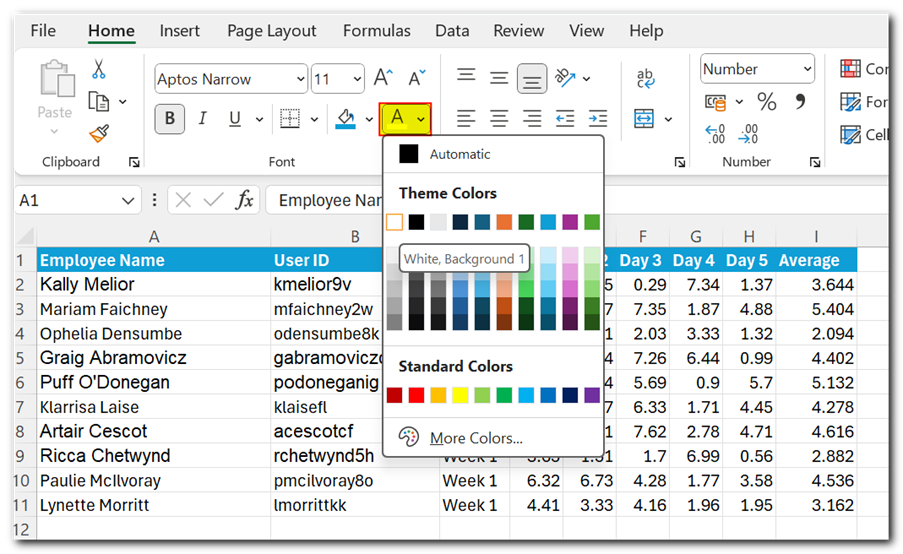
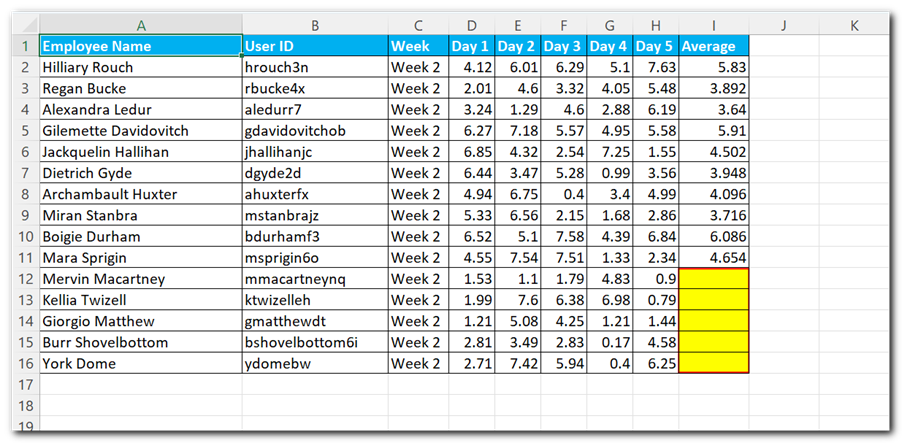
Now lets’ format header, for that we will select the header from cell A1 to I1 and change it color to light blue.
Also change the font color to white to make it more readable.
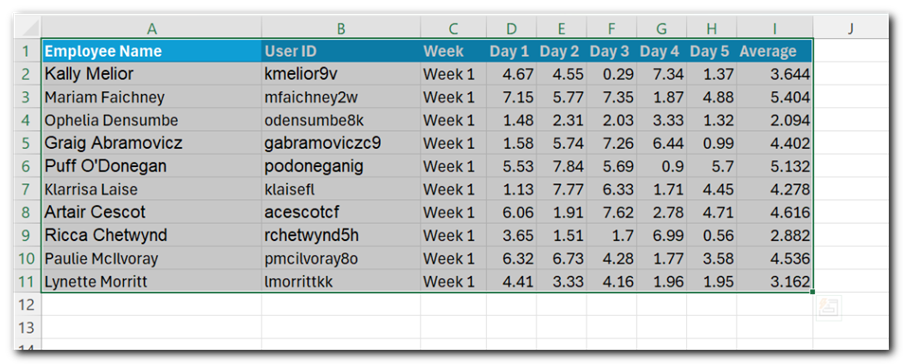
Again let’s use Excel Shortcut Ctrl+Shift+Down key to select the entire data range including header.
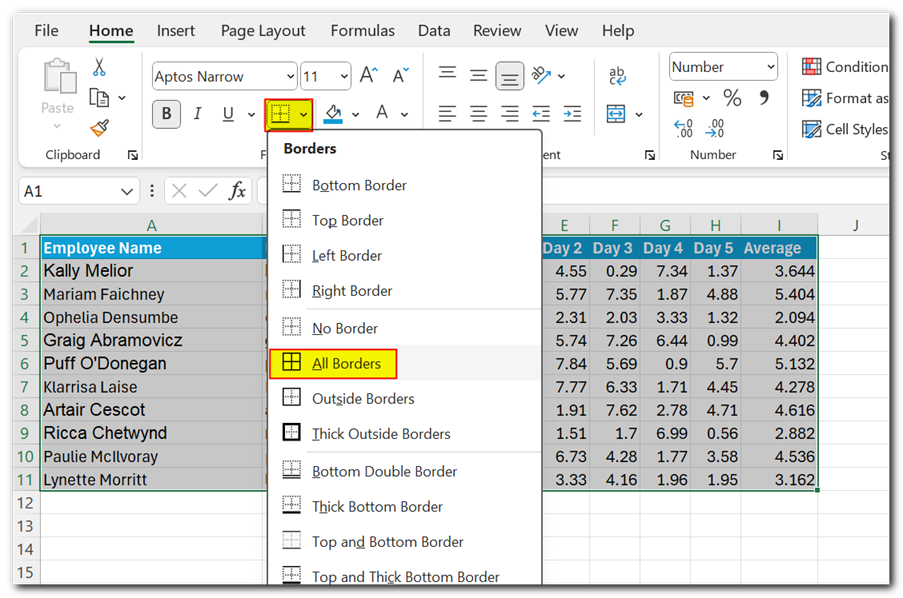
Now add borders to the selected range. Border option can be found in Home menu.
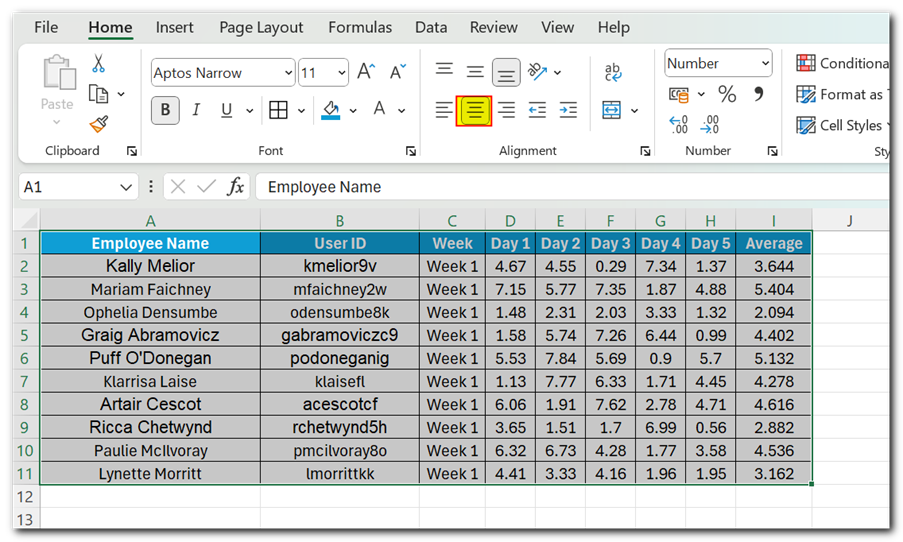
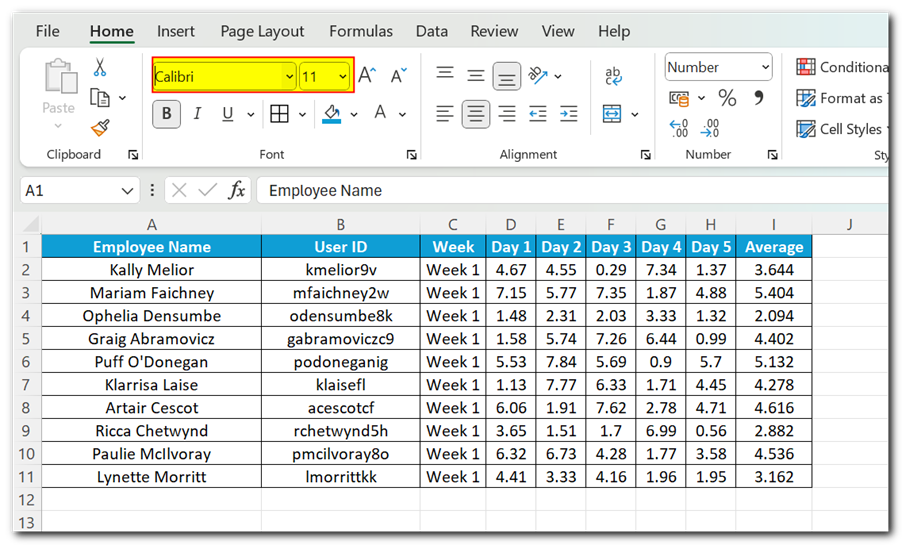
We are now left with the final steps of formatting. Let’s center align all the cells.
And change the font to Calibri 11.
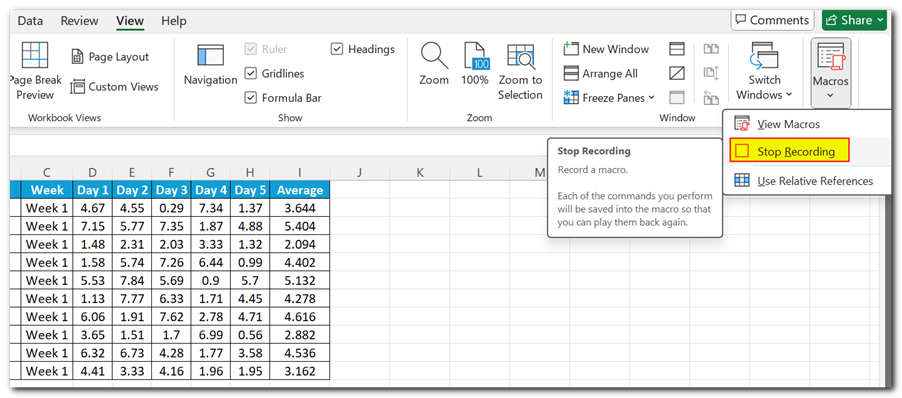
Once we’ve finished our actions, it’s time to stop the macro recording. Simply go back to the “View” tab, click on “Macros,” and select “Stop Recording.”
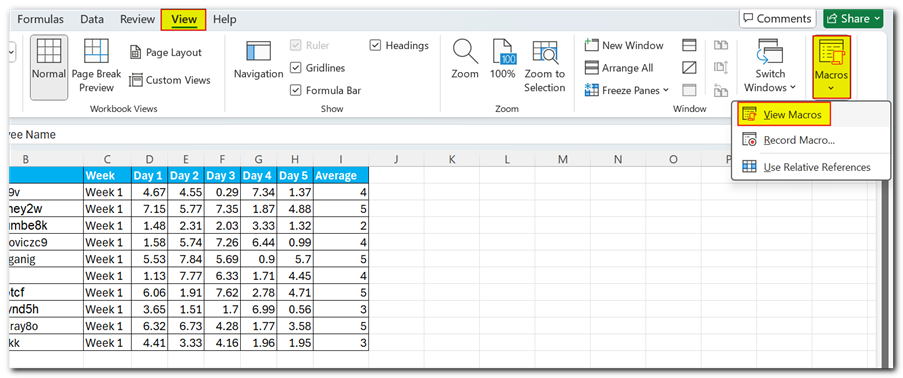
Let’s understand the code which got generated while recording. For that we will click on View>Macros>View Macros.
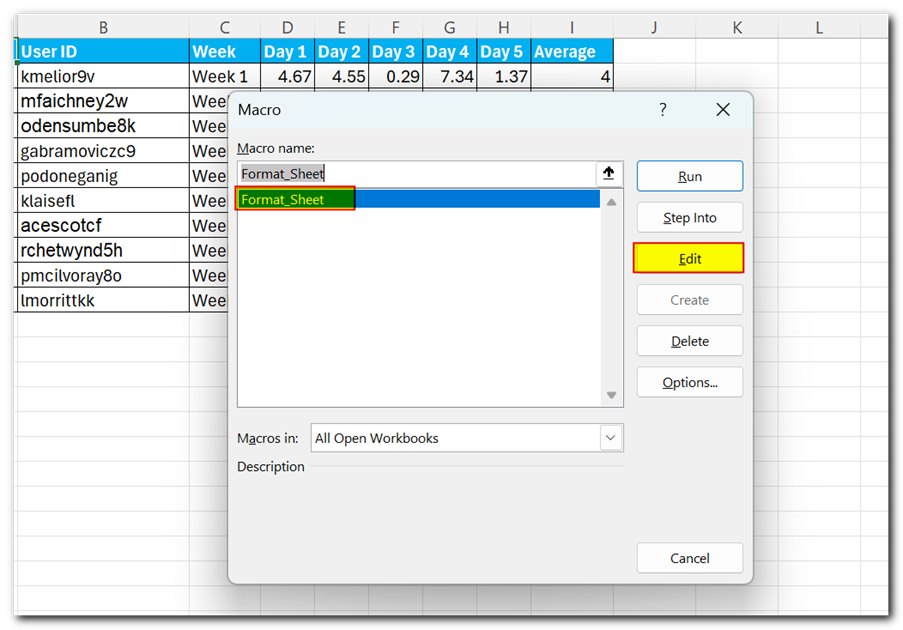
Select the macro you have recorded and click on Edit
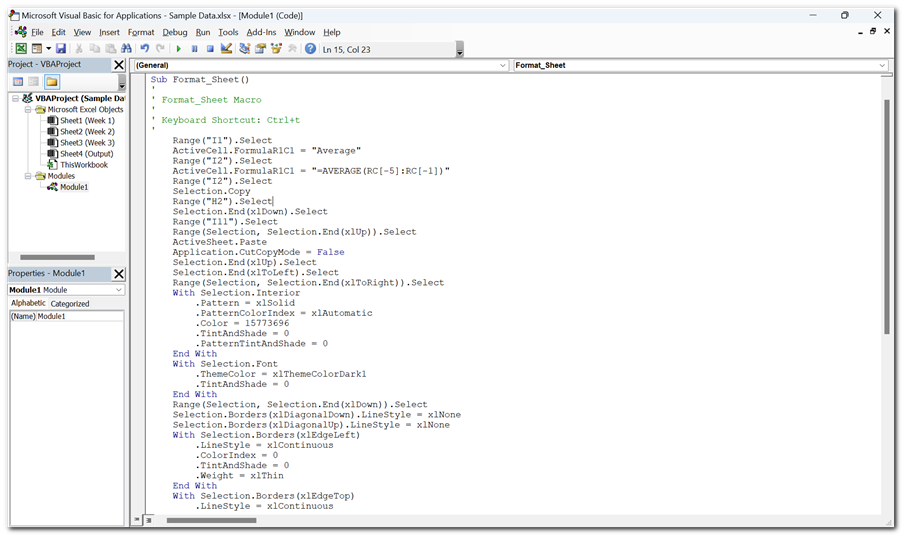
You will be able to see the code which is generated while you were performing the steps.
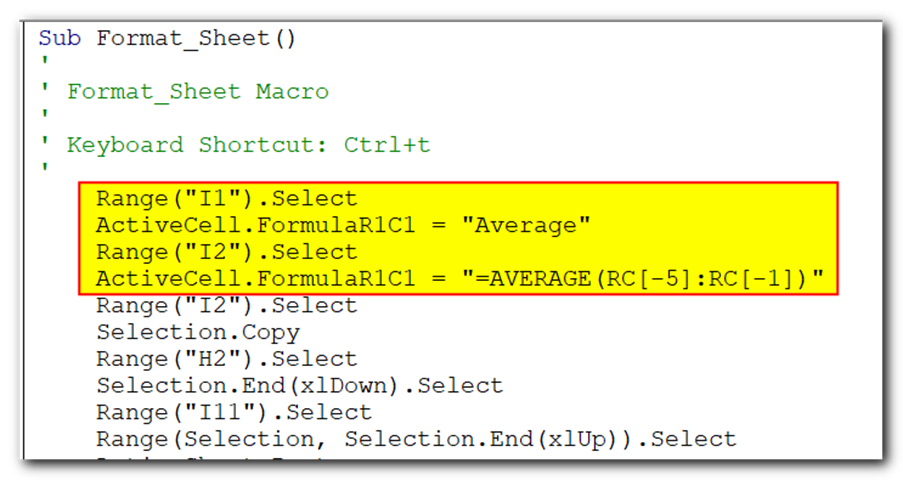
If we break the code, you will be able to understand it better. Like first 4 lines of code are the steps where we selected I1 cell, typed Average as header, selected A2 cells and enter the formula as “=AVERAGE(D2:H2)”.
Here you may notice that the formula which got recorded is different than what we typed. The reason is while recording, Excel uses relative position instead of absolute position. Like in the recorded formula you will see RC[-5]. Here R means Rows and C means columns. RC[-5] represents -5 columns from current position. We were on cell I2 (check line 3 of the highlighted code) and -5 columns takes us to column D2. Same way RC[-1] takes us to column H2.
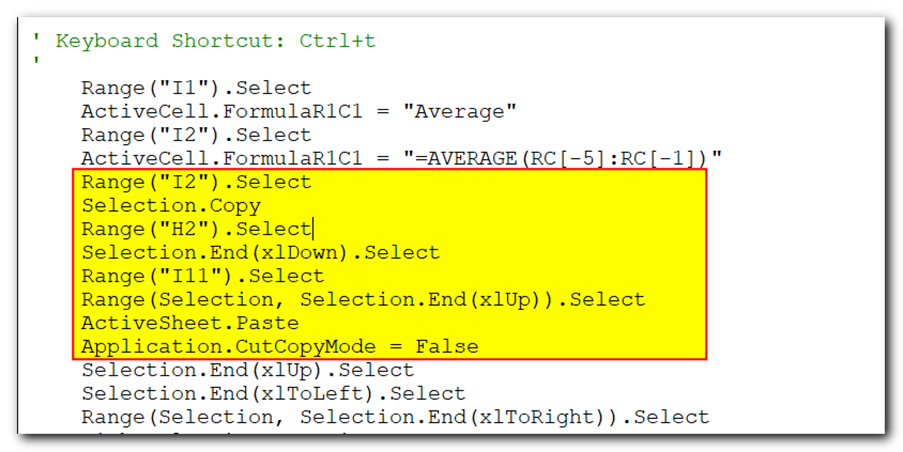
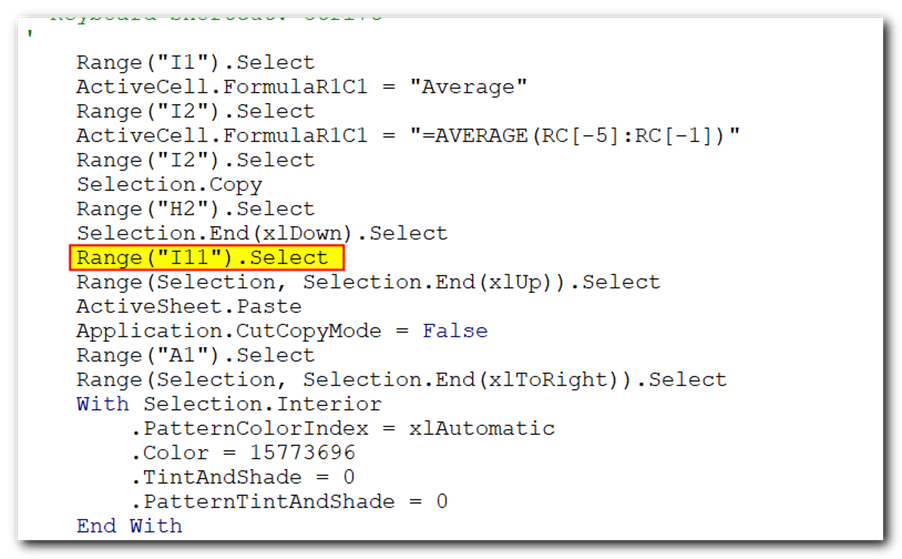
The next lines of code got generated when we selected I2 cell, copied the formula. Selected H2 cell. Pressed Ctrl + Down key, selected I11 cell, used Ctrl + Shift + Up key and pasted the formula.
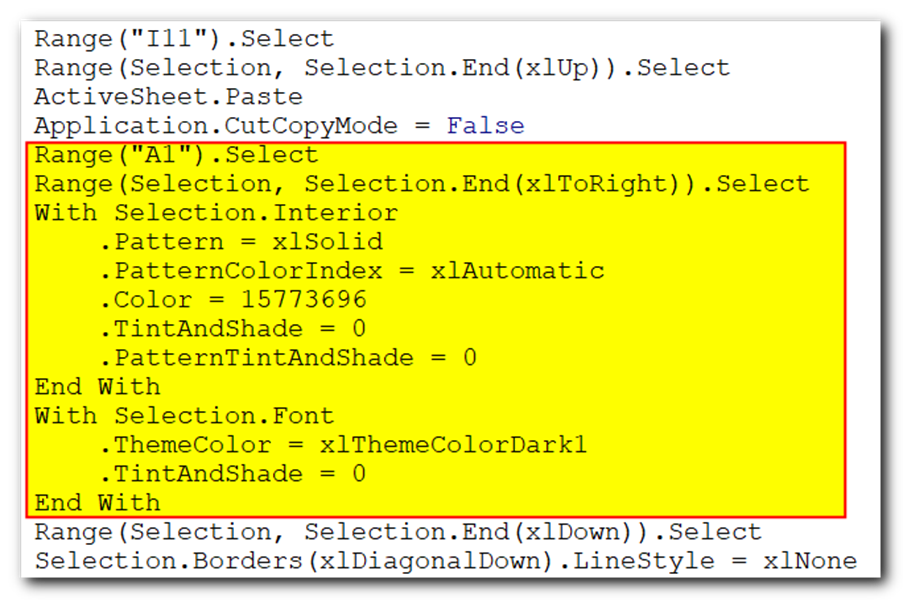
The next line of codes represents selecting header row, change it color to light blue and change it’s font color to white.
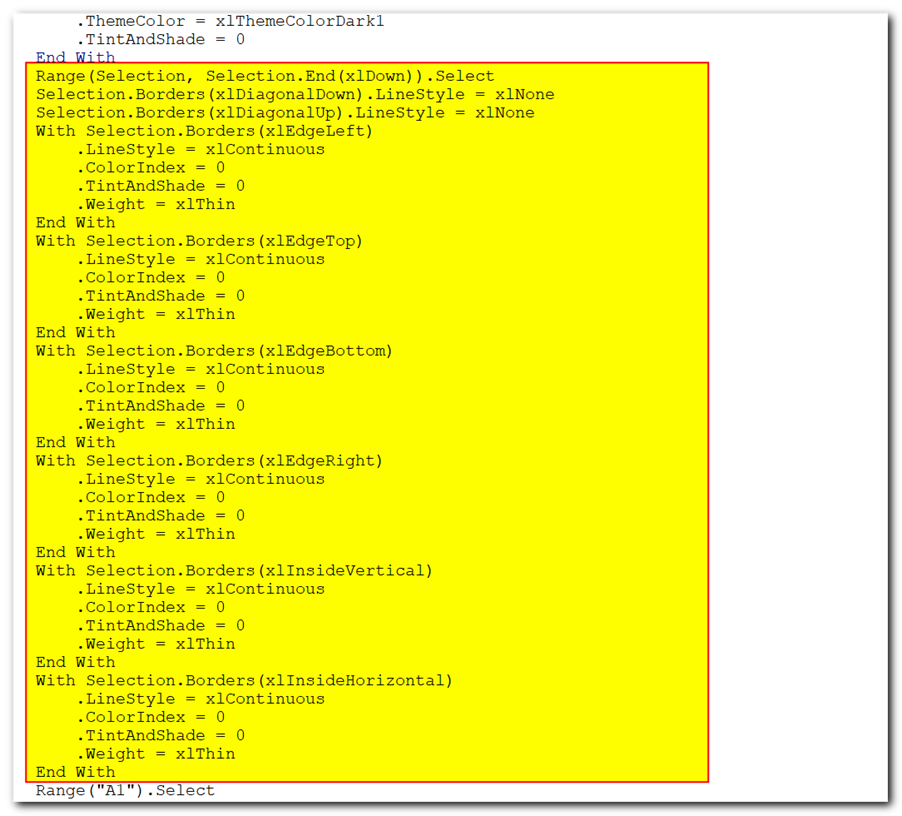
The long code after that is for changing the cell borders. The first line of highlighted code represents using Ctrl + Shift + Down key. After that rest code is for changing border of the selected range.
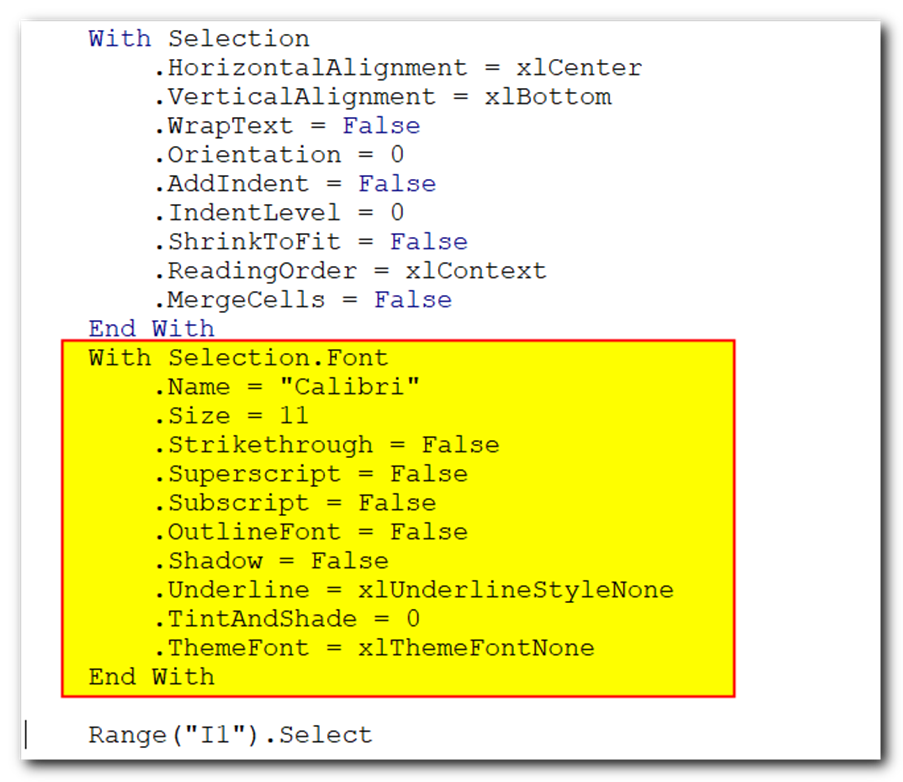
Finally the last part of the code represents changing font name to Calibri and size to 11.
Now it’s time to put our macro to the test. Apply it to another sheet and see if it works as expected. If there are any issues, like hardcoded selections or formatting errors, we’ll need to debug the macro by tweaking the code.
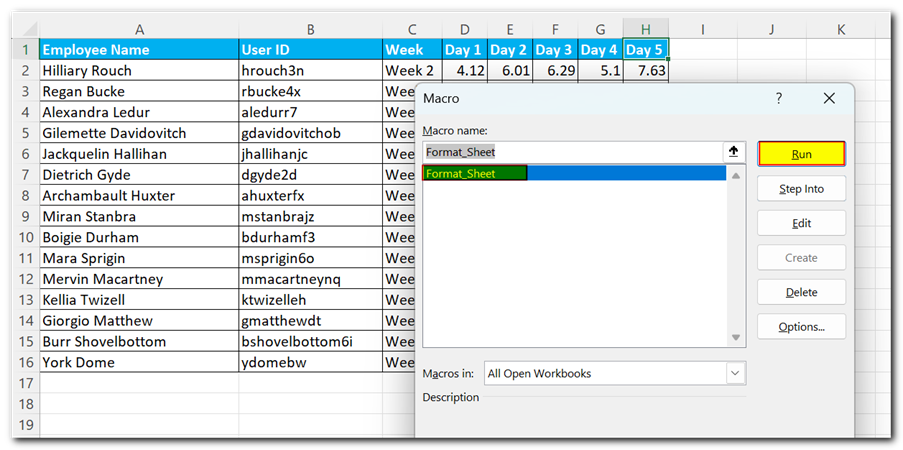
For testing, we will go to second sheet where cell formatting is not yet done. Then will open the view macros dialog.
Select the macro you have recorded and click on Run
You will notice that macro has performed most of the actions; however it has missed dragging the formula till the end.
The issue is caused due to few steps got recorded with absolute cell reference. Like in below code where we selected cell I11 and pressed Ctrl + Shift + Up key. Because we selected cell I11, the code will never select entire range (on second sheet it was suppose to be till row 16).
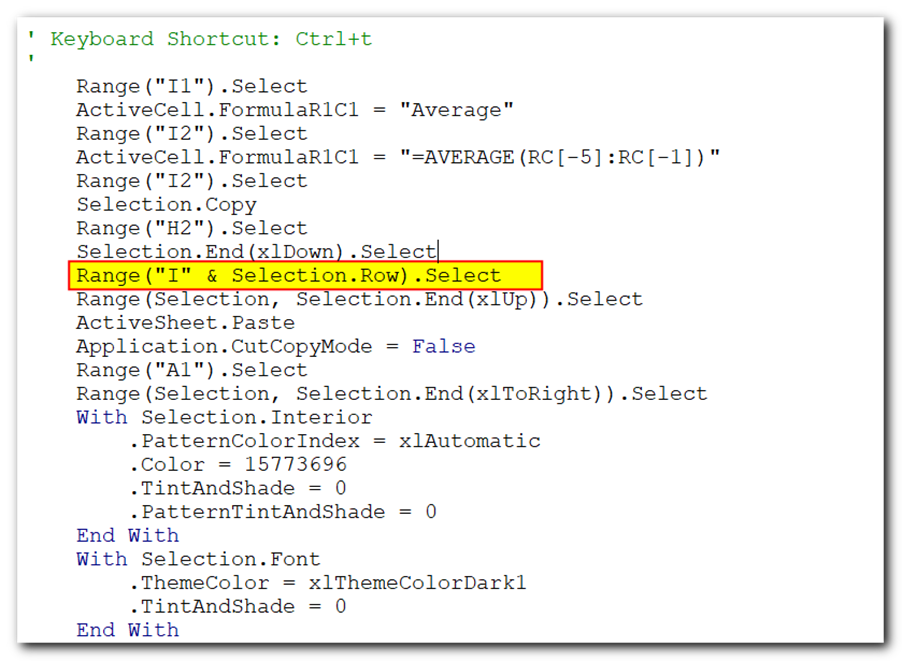
To fix it, we need to change the code and make it dynamic. So instead of selecting I11 cell, we will select the same row which got selected from earlier step (Selection.End(xlDown).Select). In the highlighted code 11 is changed with Selection.Row.
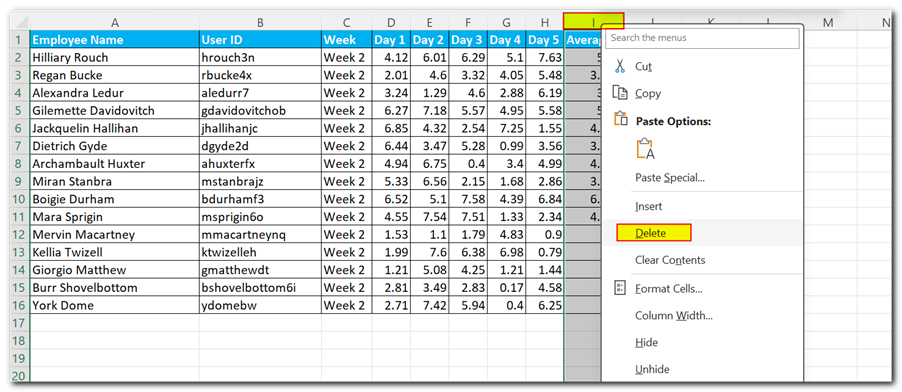
Now let’s re-run the code after deleting column I in the second sheet.
Now the output is as per our expectation and the Average formula is dragged till the end.
In case you want to add some patch code in the main code. You can record it separately and copy the code at the relevant place in main code.
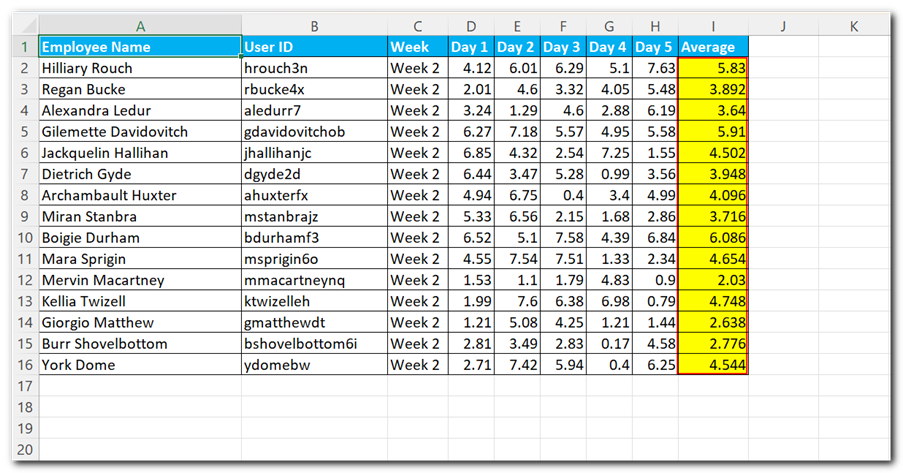
For example, let’s try to record another macro just to change the format Average column from 3 decimal places to 2 decimal places.
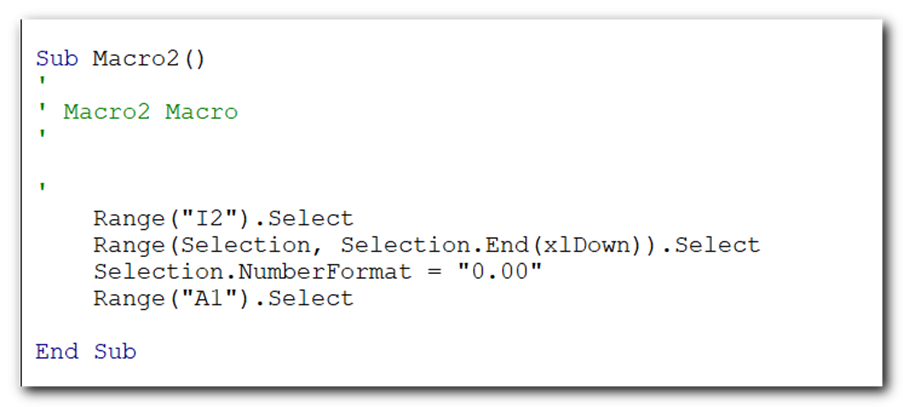
The recorded code generated for changing the cell format to 2 decimal places look like below.
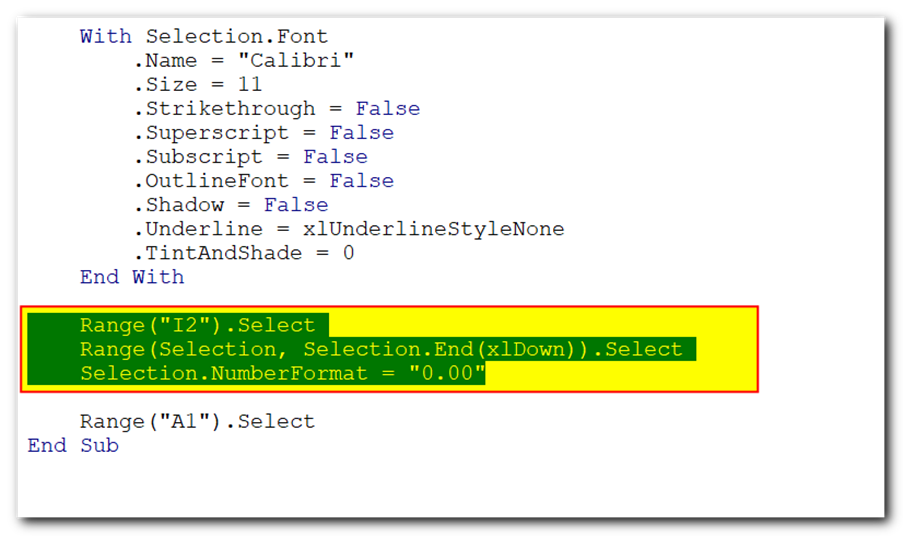
Let’s patch this code as last step in the main code “Format_Sheet”
With this, we got our final code that can be used to format the data in the desirable format.
Congratulations! You’ve successfully written your first macro in Excel. By automating repetitive tasks, macros enhance efficiency and productivity. Remember, practice and experimentation are key to mastering VBA macros. Explore further possibilities and keep refining your skills. Happy macro coding!

VBA Code To Delete All Shapes On A Excel sheet Here is a VBA code which deletes all the shapes from an Excel sheet. Code is simple but you have to be bit careful while…

In MS Access, the best way to create a multiuser tool is to divide your solution. One part acts as interface and other one acts as database. You can have multiple copies of the interface distributed to users which are connected to central MS Access database saved at common shared drive. To connect the interface to database, you can use link table feature (Access>External Data>Import & Link) available in MS Access. Below is a commonly required VBA code which helps the developers to re-link MS Access linked tables when the database is renamed or moved to other location
What is the Usage of sheet color in Excel? When we prepare a report or a dashboard it is easy to identify or analyze reports with a change of color sheet tabs. Analysts generally give…

VBA Code To Add New Sheet In VBA, it is sometime important to add a worksheet at the right place in the Excel. Here is a simple an effective code that adds a new worksheet…

VBA Code to Sort Data HERE IS A ONE LINE CODE FOR DEVELOPER’S REFERENCE WHICH CAN BE USED TO SORT DATA ‘Sort data in ascending order on Column F (Created At) Sheet1.Range(“A1:G” & Sheet1.Cells.SpecialCells(xlCellTypeLastCell).Row).Sort Key1:=Sheet1.Range(“F1”),…

Have you ever got into situation in office where you need to count the cells in Excel sheet with specific color? If yes then you can use following code which counts the number of cells…