Sort data in Power Query in Excel is a fundamental skill for organizing and analysing information efficiently. In this guide, we’ll walk you through the process step by step, ensuring you understand how to effectively sort your datasets. Whether you’re new to Excel or looking to enhance your data management skills, mastering this technique will streamline your workflow and empower you to make informed decisions. By the end of this tutorial, you’ll be equipped with the knowledge and tools necessary to sort data using Power Query in Excel confidently. Let’s dive in and get started!
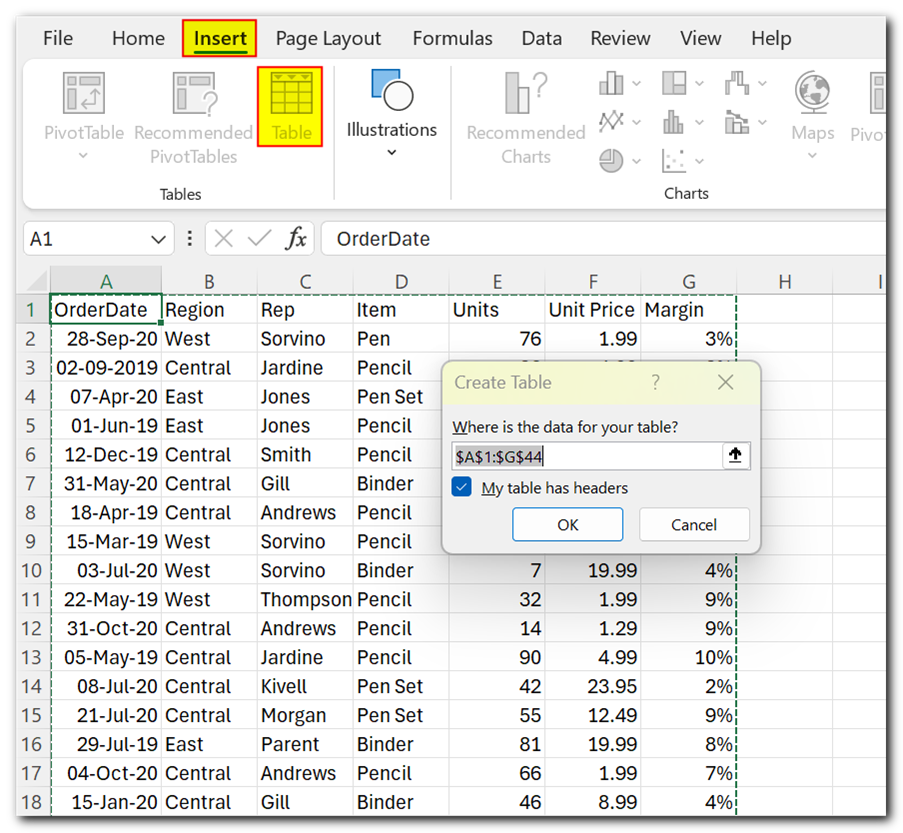
If your data isn’t already formatted as a table, you can easily convert it by going to the “Insert” menu and selecting “Table.” This will ensure Power Query can understand your data structure.
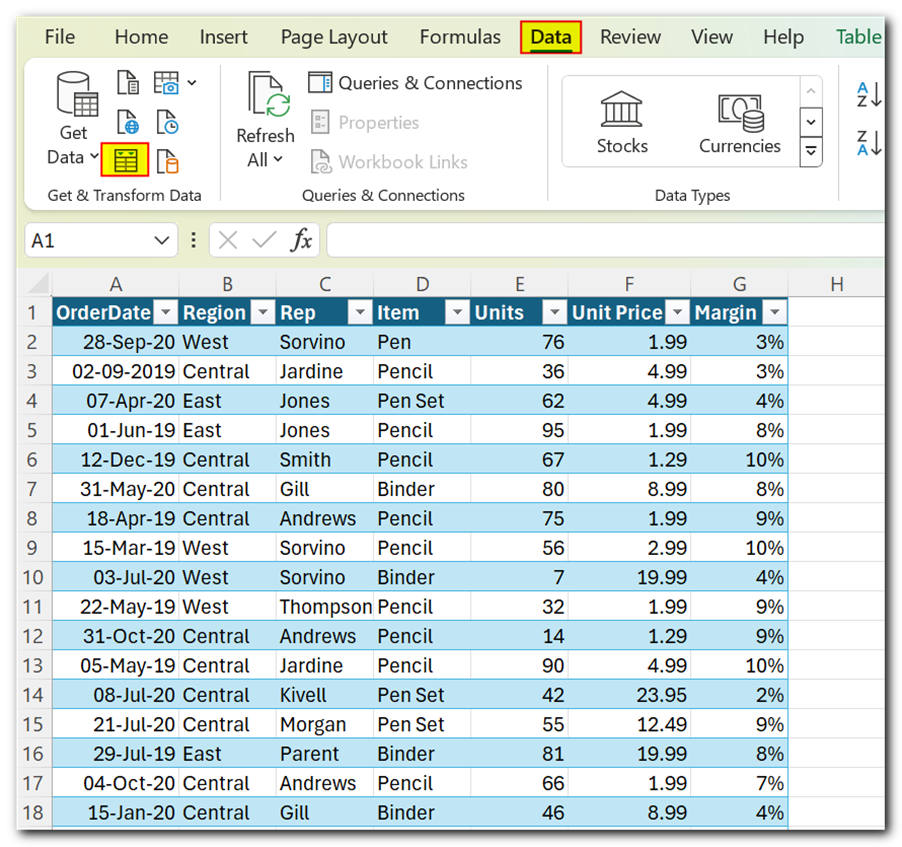
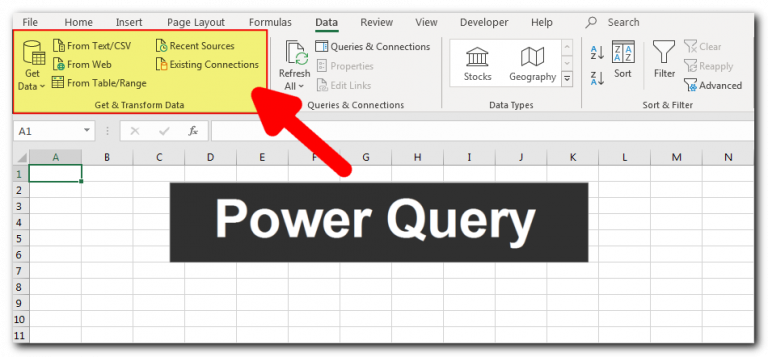
Once you’ve converted your data into a table, click on “Data” menu and “From Table/Range”. Excel will automatically open the Power Query Editor. Here’s where the sorting magic happens!
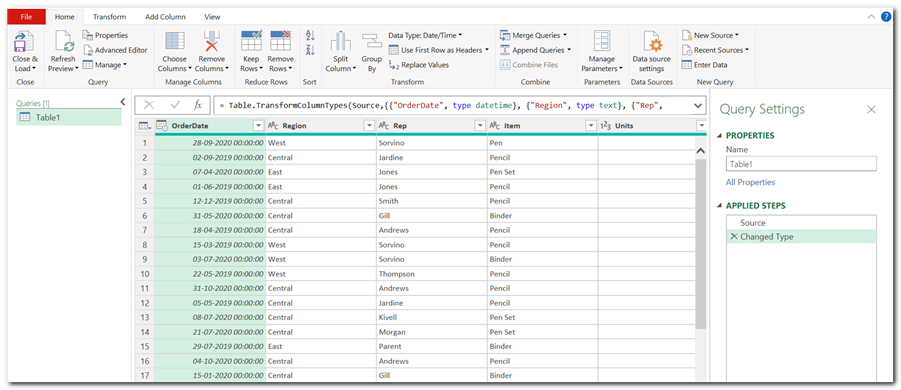
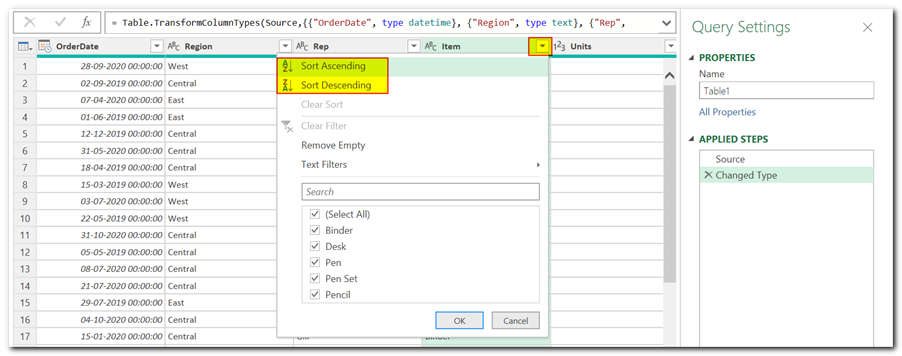
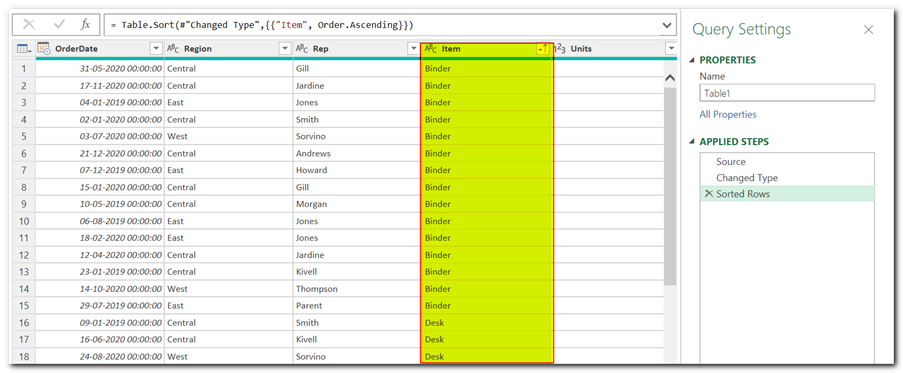
Let’s say you want to organize your data by items. In the Power Query Editor, click the down arrow next to the column header. You’ll see options to sort the data in ascending or descending order. Choose “Ascending” to arrange items alphabetically from A to Z.
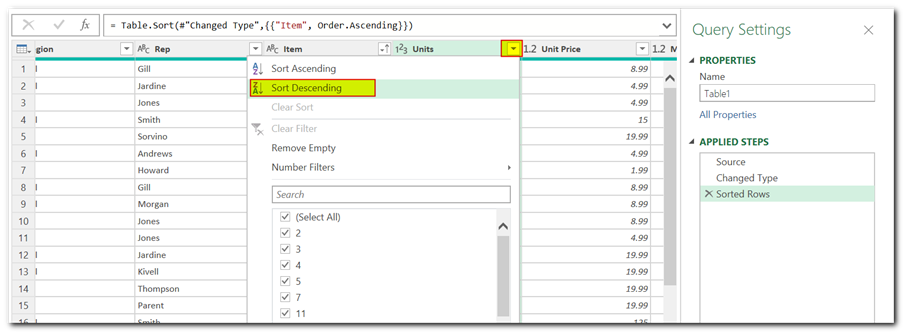
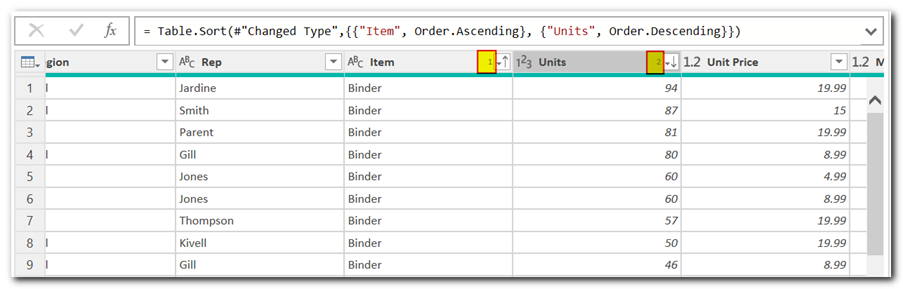
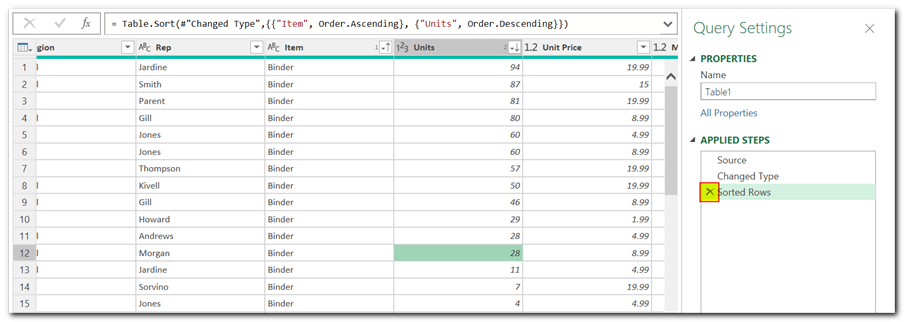
But what if you want to sort by multiple criteria? Power Query allows you to create multiple sorts. For example, you might want to sort by “Item” first, then by “Unit” in descending order (highest to lowest).
To achieve this, simply click the down arrow next to the “Unit” column header and select “Descending.” You’ll notice that the data remains sorted by “Item,” but within each item category, units are now organized from highest to lowest.
A small “1” and “2” will appear next to the column headers, indicating the order of sorting applied. In this case, “1” signifies “Item” is sorted first, followed by “Unit” at “2.”
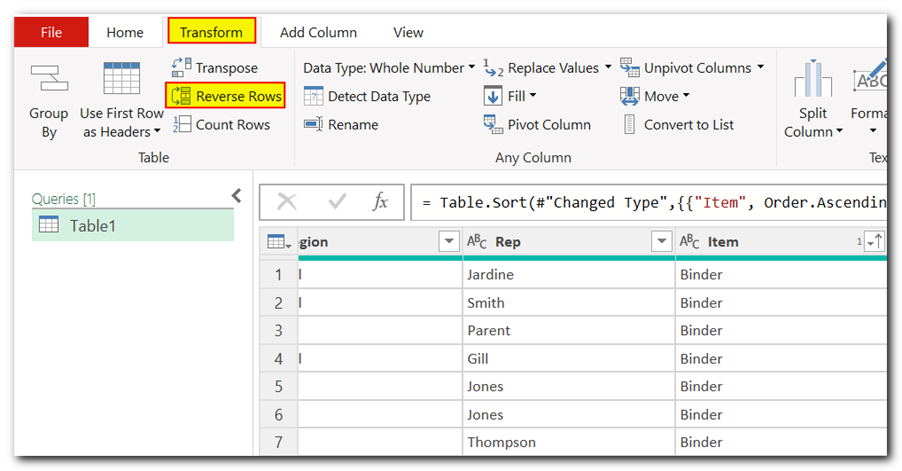
Power Query offers an option beyond traditional sorting. You can completely reverse the order of your data rows. This might be useful if you want the information currently at the bottom to be at the top, and vice versa.
Head over to the “Transform” menu and select “Reverse Rows.” This will flip the order of your data, placing the bottom row at the top and so on.
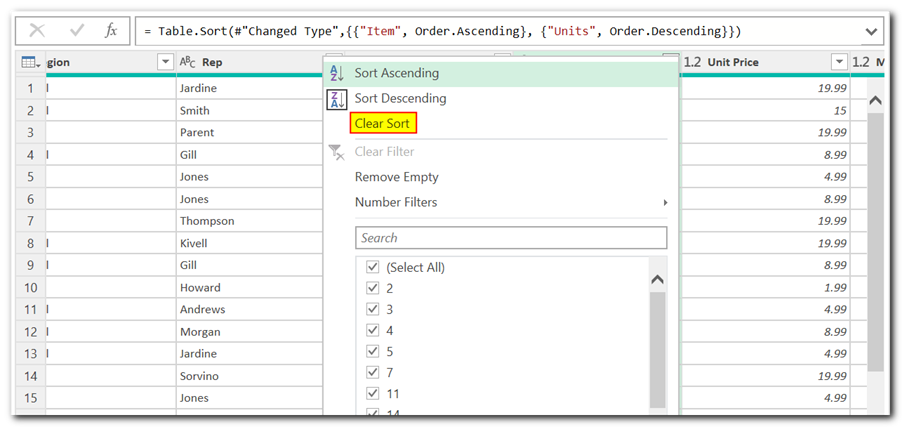
Let’s say you’ve applied multiple sorts and want to make some adjustments. You can easily clear specific sorts without affecting others. Click the “X” next to the sort step you want to remove entirely.
For more granular control, click the down arrow next to the column header and choose “Clear Sort.” This will remove the sort applied to that specific column while preserving any remaining sort criteria.
By mastering Power Query’s sorting functionalities, you can organize your Excel data with ease. Whether you need simple alphabetical sorting or intricate multi-level arrangements, Power Query offers the tools to streamline your data manipulation process. With its intuitive interface and clear visualizations, Power Query empowers you to transform your data into a well-structured and easily digestible format.

VBA Code to Sort Data HERE IS A ONE LINE CODE FOR DEVELOPER’S REFERENCE WHICH CAN BE USED TO SORT DATA ‘Sort data in ascending order on Column F (Created At) Sheet1.Range(“A1:G” & Sheet1.Cells.SpecialCells(xlCellTypeLastCell).Row).Sort Key1:=Sheet1.Range(“F1”),…
In today’s digital era, efficient file management is essential for productivity and organization. Whether you’re handling work documents or personal files, mastering effective file organization techniques can save you time and effort. In this step-by-step…
Introduction In this article, we will learn about joining multiple excel tables with Power Query. Consider a situation where you have employee data in two sheets of an Excel file. In the first sheet you…
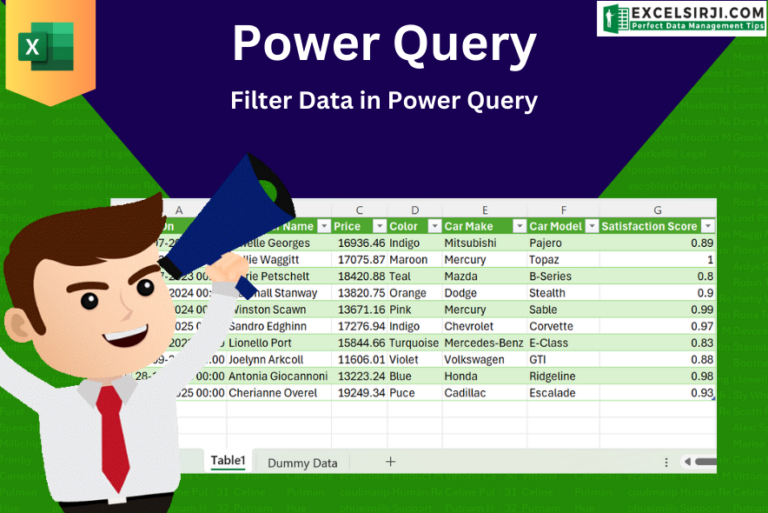
This step-by-step tutorial empowers you to leverage Power Query’s robust filtering capabilities. Learn to filter by date, text, numbers, and more, streamlining your workflow and unlocking deeper insights from your data. Watch now and elevate your Excel expertise!
Introduction to Power Query Hi Friends, we are starting with a new series of articles on a very important feature of MS Excel. Yes, that is Power Query. It was first introduced with Excel 2010…
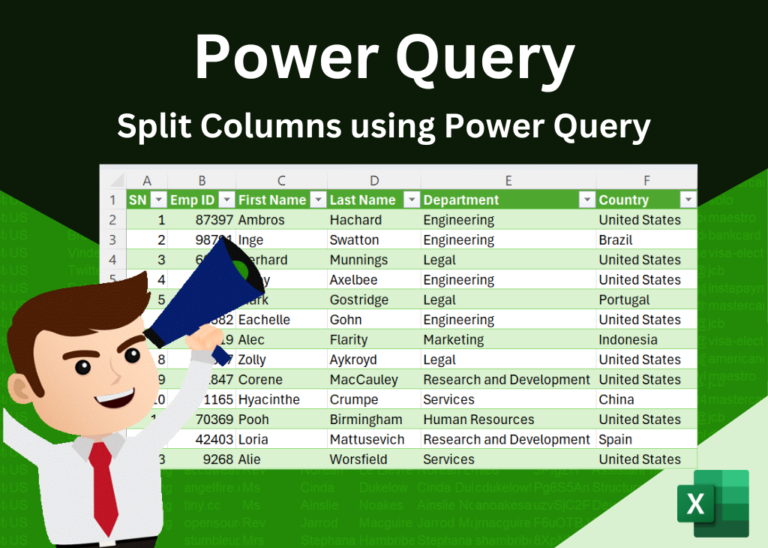
Introduction Welcome to this comprehensive guide on using Power Query in Excel to split data efficiently. In this tutorial, we’ll walk you through the step-by-step process of splitting columns, specifically focusing on splitting the name…