


Excel’s great for calculations, charts, etc. But files can bloat as you add data.
Reducing file size in Excel typically refers to techniques used to decrease the storage space required by an Excel workbook. This can be important for several reasons, including easier sharing and storage of files, faster loading times, and reduced strain on system resources.
There are ways to reduce file size in Excel, which we’ll cover here.
The easiest way to shrink your Excel file is to remove unnecessary data. This doesn’t require any fancy tricks!
This simple step can make a big difference, especially with large files.
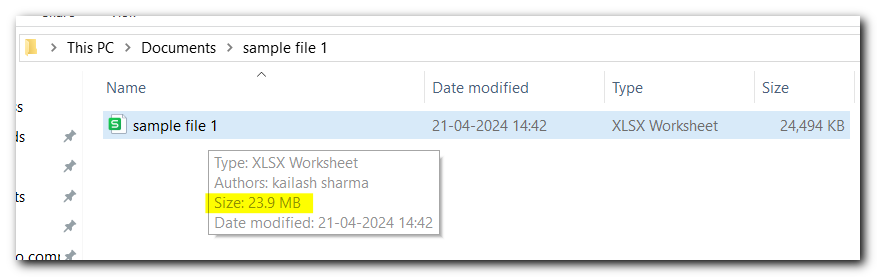
We have an Excel workbook that is 41.5 MB in size, and it takes a long time to open and save. The workbook contains 15 worksheets filled with the details of a company.
Here’s a quick summary:
Absolutely! Removing unnecessary worksheets can significantly reduce file size, sometimes even by as much as 50%. It’s a simple yet effective way to compress a file – just trim the excess baggage! 😃
This method is easy and can reduce the file size of your Excel workbook, making it easier to store and share.
Zipping Excel files can reduce their size by 80% to 90%.
To compress your Excel file by zipping it, you can follow these steps:
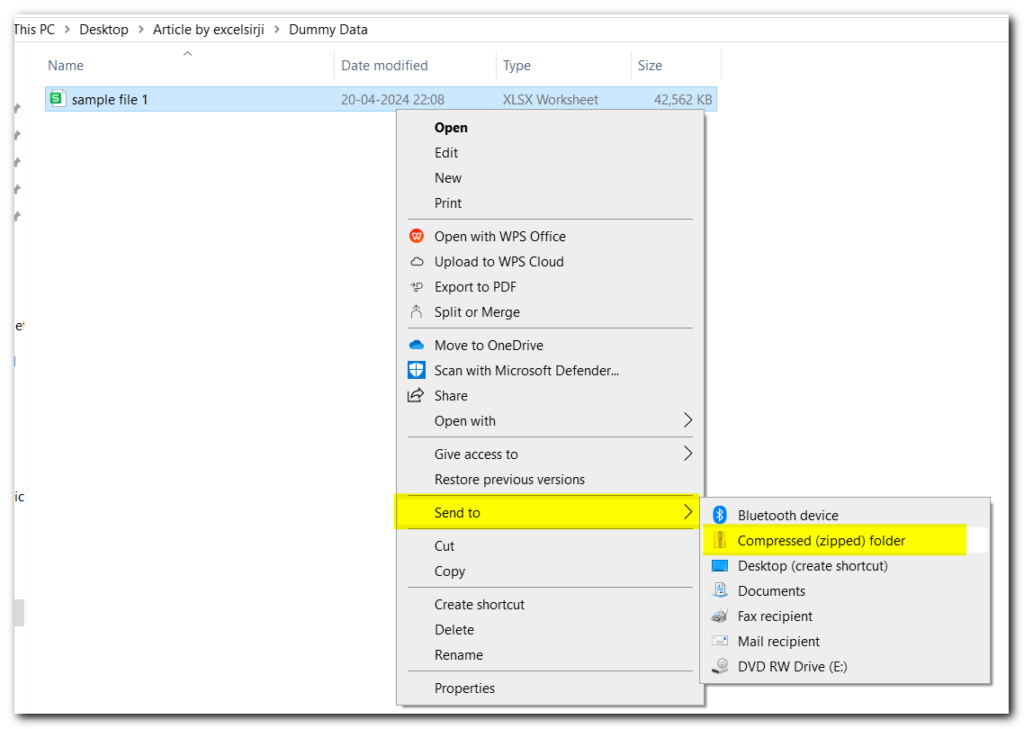
Select the Excel file you want to compress.
Right-click the file:
Choose “Send to” -> “Compressed (zipped) folder.”
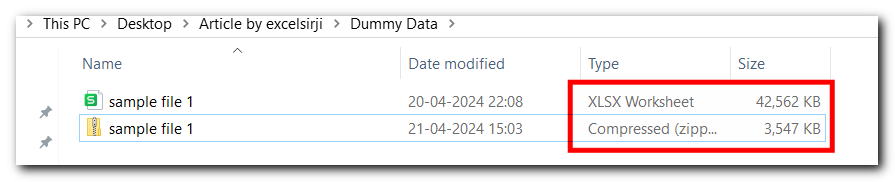
Check the size of the newly created ZIP file. It should be smaller than the original Excel file.
When you use “Compressed (zipped) folder” in Windows, it creates a smaller ZIP file of your Excel file in the same location.
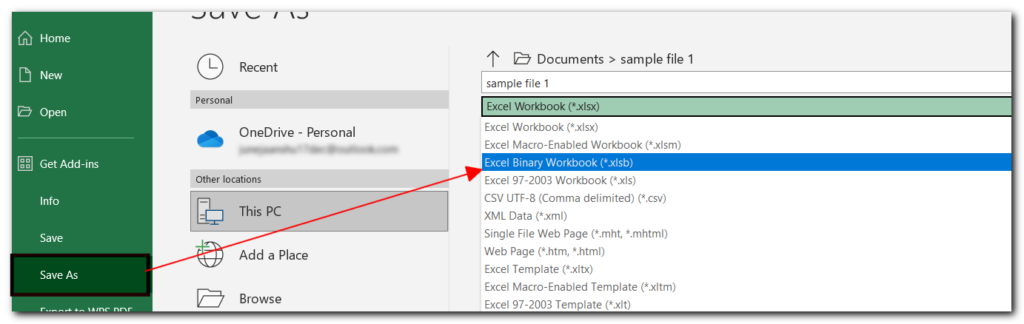
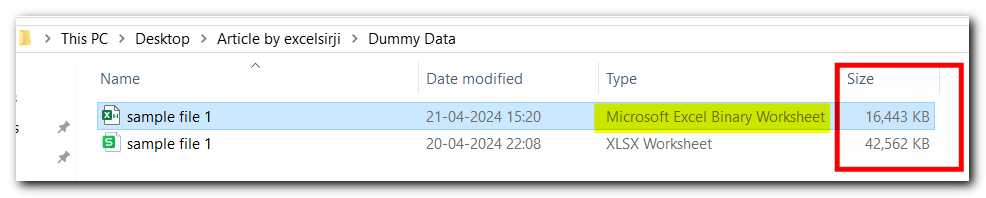
Convert your file to binary to shrink its size. Just save it as XLSB—it’s that simple!
We have an excel file that takes 13MB of space on the disk.
To do this, follow these steps:
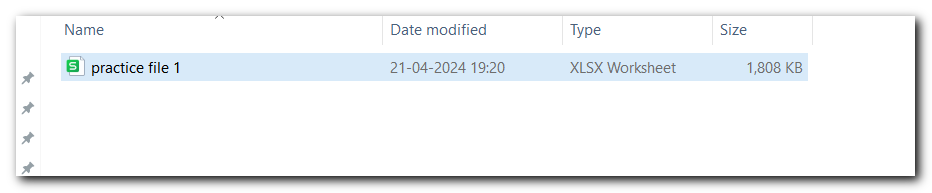
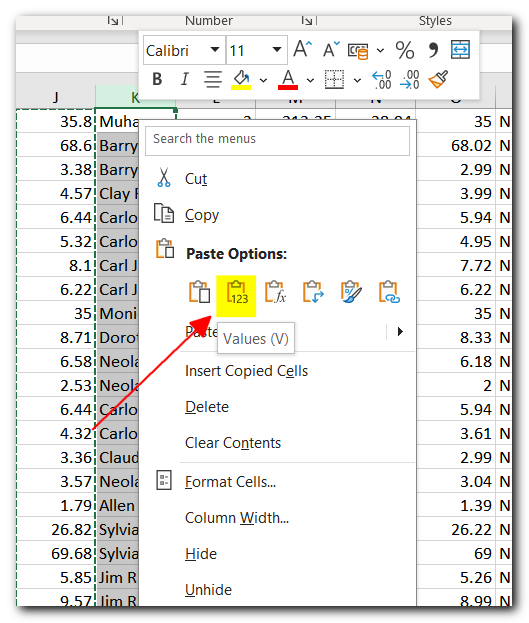
“Formulas can increase Excel file size. Reduce size by removing or converting unnecessary formulas to values.”
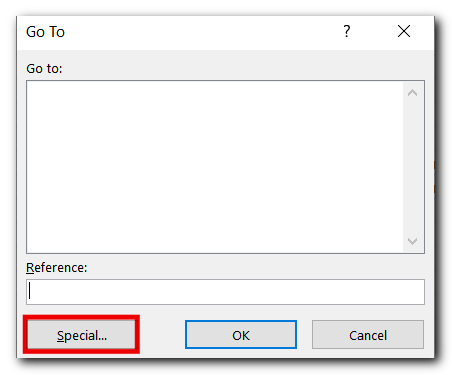
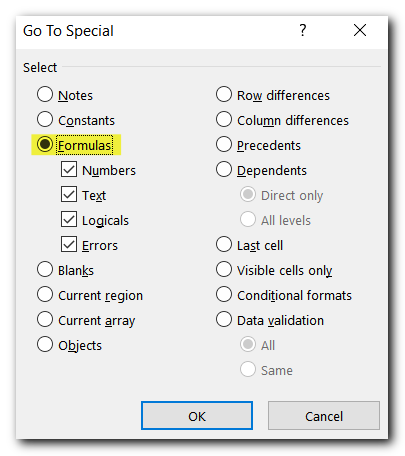
2. Select Formulas
3. Excel will select all formulas in your spreadsheet.
4. Press CTRL + C to copy them.
5. Select a cell and press CTRL + V to paste them. Select Paste “Values”
Excel will paste all the formulas as values now. Save the file to view the impact.
The size of the file has been reduced.
Removing data formatting means getting rid of things like background colors, borders, and font styles in Excel. While it won’t make a huge difference in smaller files, it can help reduce the size of larger Excel files.
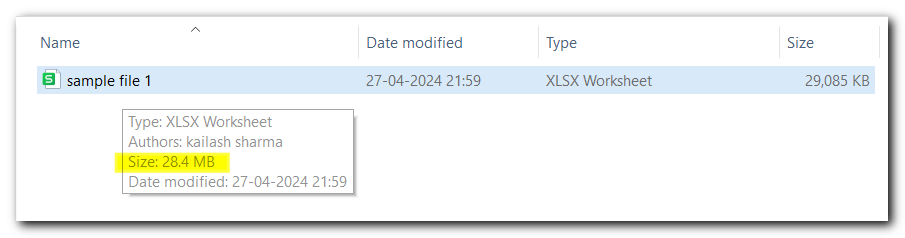
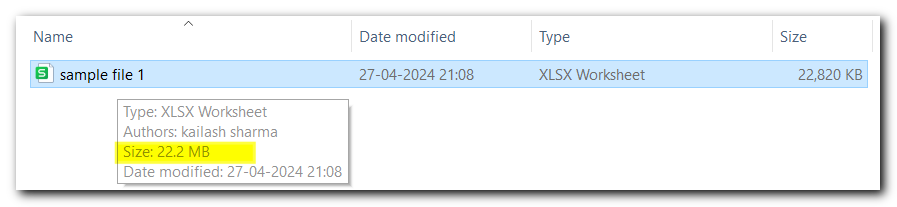
We have a 28.4 MB file with formatting like color, font, style, themes, etc.
To reduce file size, remove unnecessary formatting:
Excel will clear all the formatting in the workbook.
5. Save the file.
Now you can see the size of the file has dropped down.
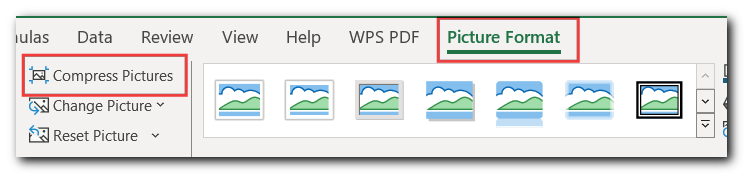
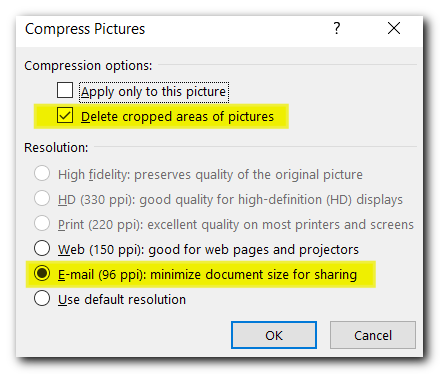
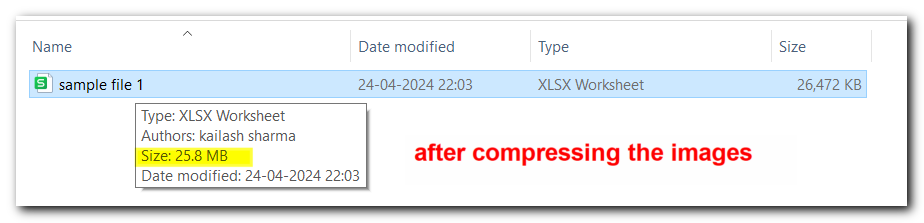
If your Excel file has images, you can compress them to reduce the file size. However, this may reduce the image quality.
To avoid this, compress the images before inserting them into Excel using a free online tool. You can also compress the images within the Excel file itself.
To compress images in Excel:
When you click “Compress Picture” in Excel, a dialog box appears. In this box:
3. Press Ok and save the file.
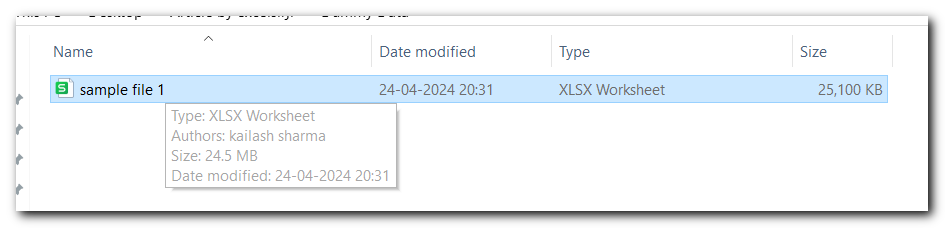
Compressing the images in the Excel file reduced the file size.
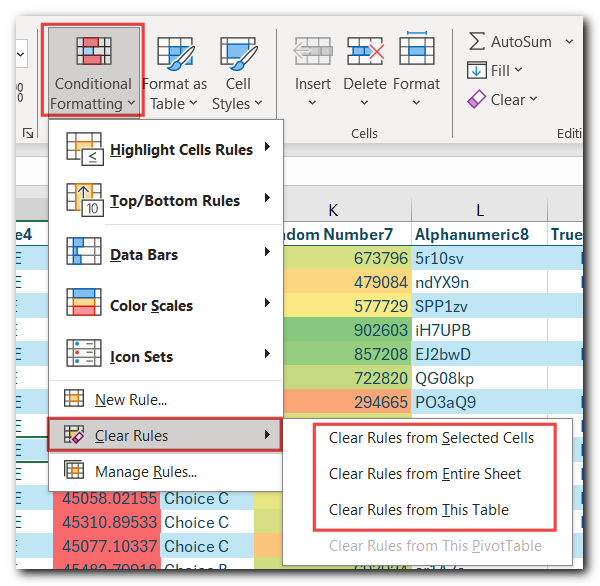
When you have lots of rules for conditional formatting in Excel, it can make your sheet slower. This is because each rule makes Excel recalculate all the data whenever you make a change. Removing some of these extra rules can speed up your sheet.
Here the size of the file is 25 MB
To reduce file size by clearing conditional formatting in Excel:
7. Save workbook.
Now we can see the difference, the file size has reduced to 24 MB.
Hope you enjoyed reading this article. Thank you🤗🤗

This Excel VBA Code converts the excel range into HTML and also can convert Excel to HTML Table to paste data on Outlook Email Body

How to Compare TWO Columns in Excel? Comparing Columns in Microsoft excel is much often feature that is used while managing database. We have many ways to compare the columns in excel and can be…

Delta Symbol in Excel The Greek Capital Alphabet letter Delta (▲) and is commonly discussed topic in Excel. This is being used for various purposes i.e. changes in quantity, insert the symbol in excel etc….
In Excel, a line break lets you finish one line of text and begin another within the same cell. It helps create separate lines of information without needing to move to a different cell. In…

In layman language, this chart divides the data into multiple range groups with same interval i.e. 1-5, 5-10… and then plot the data into these groups to find the distribution among these group. So that you may understand, what are the major areas which has large impact or your major data fall. This helps the user to understand the nature of your data

Create Dynamic Data Validation List When I started my career in working with excel dashboards, I always used to face most common challenge in “Data Validation” technique where I want a smart data validation to avoid all…