Today let’s try to understand how ColorIndex property in Excel VBA works. It is an easy and effective way to quickly complete the development. ColorIndex property is normally used by VBA developers to fill cell, border and font colors. ColorIndex returns values from 1 to 56, -4105 and -4142.
From index 1 to 56 are actual colors which provides various types of colors. Have a look at below color variations
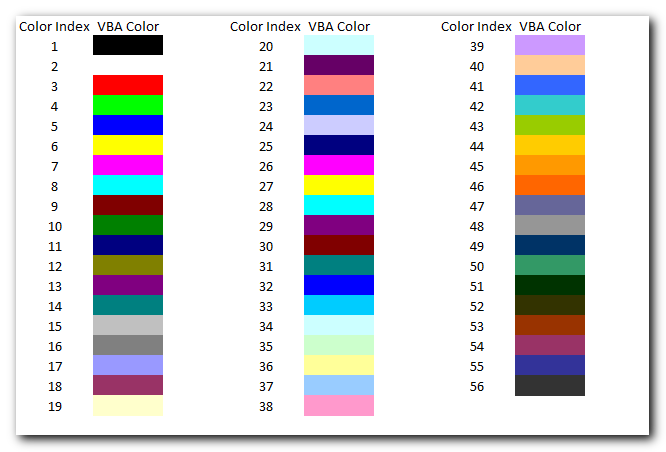
Let us now see how we can implement ColorIndex in VBA codes:
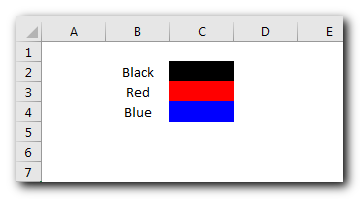
Sub ColorIndexExample1()

    Sheet1.Range("C2").Interior.ColorIndex = 1 'Black
    Sheet1.Range("C3").Interior.ColorIndex = 3 'Red
    Sheet1.Range("C4").Interior.ColorIndex = 5 'Blue

End SubHere we have set the color of the cell using ColorIndex. ColorIndex = 1 is used to change the cell color to Black. Similarly, ColorIndex 2 and 3 are used to change the cell color to Red and Blue respectively. ”Example 2: Changing Border Color”
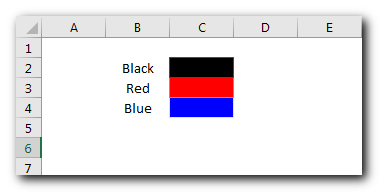
Code:
Sub ColorIndexExample2()

    Sheet1.Range("C2").Borders.ColorIndex = 3 'Red
    Sheet1.Range("C3").Borders.ColorIndex = 4 'Green
    Sheet1.Range("C4").Borders.ColorIndex = 6 'Yellow

End Sub
Explanation:
In the above code, we have changed the border color of the cells using ColorIndex property available under Borders function of Range. ”Example 3: Changing Font Color”
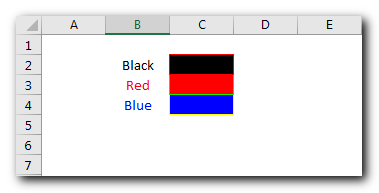
Code:
Sub ColorIndexExample3()

    Sheet1.Range("B2").Font.ColorIndex = 1 'Black
    Sheet1.Range("B3").Font.ColorIndex = 3 'Red
    Sheet1.Range("B4").Font.ColorIndex = 5 'Blue

End Sub
Explanation:
In this third example, we have changed font color of the cell using ColorIndex property.
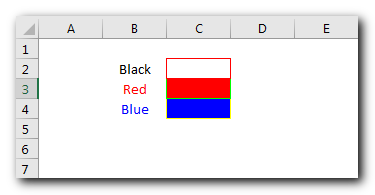
Both -4105 and -4142 are special enumeration to set the ColorIndex to Automatic or None. If ColorIndex is supplied as -4105 (xlColorIndexAutomatic) then cell color, border or font is set to Automatic. Below is a sample code
Code:
Sub ColorIndexExample4()

    Sheet1.Range("C2").Interior.ColorIndex = xlColorIndexAutomatic

End Sub
Explanation:
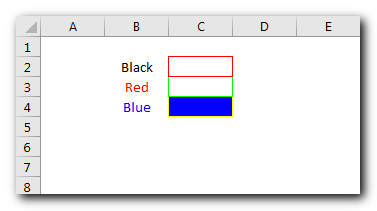
The above code changes the cell color of C2 on Sheet1 to Automatic which is white here. Similarly, -4142 (xlColorIndexNone) is used to set ColorIndex to none. Below is a sample code of the same:
Code:
Sub ColorIndexExample5()

    Sheet1.Range("C3").Interior.ColorIndex = xlColorIndexNone

End Sub
Explanation:
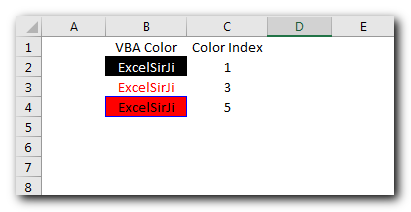
The above code changes the cell color of C3 on Sheet1 to None.=”How to Get ColorIndex of a Cell?” Below is sample code to get the ColorIndex value of a Cell Color, Font or Border:
Code:
Sub ColorIndexExample6()

    Sheet1.Range("C2").Value = Sheet1.Range("B2").Interior.ColorIndex 'Cell ColorIndex
    Sheet1.Range("C3").Value = Sheet1.Range("B3").Font.ColorIndex 'Font ColorIndex
    Sheet1.Range("C4").Value = Sheet1.Range("B4").Borders.ColorIndex 'Border ColorIndex

End Sub
Explanation:
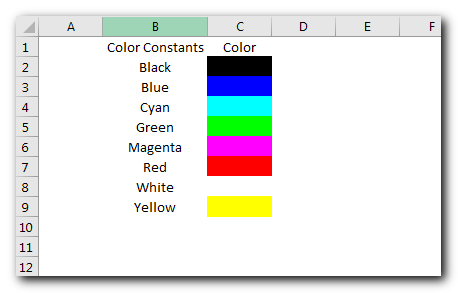
In the above code, we are reading the ColorIndex of Cell, Font, and Border Colors the value of the ColorIndex is then stored back in the sheet in the column. You can also make use of few color Constants defined in Excel VBA for quick reference.
Code:
Sub ColorConstantsExample()

    Sheet1.Range("C2").Interior.Color = vbBlack
    Sheet1.Range("C3").Interior.Color = vbBlue
    Sheet1.Range("C4").Interior.Color = vbCyan
    Sheet1.Range("C5").Interior.Color = vbGreen
    Sheet1.Range("C6").Interior.Color = vbMagenta
    Sheet1.Range("C7").Interior.Color = vbRed
    Sheet1.Range("C8").Interior.Color = vbWhite
    Sheet1.Range("C9").Interior.Color = vbYellow

End Sub
There is also one more way to work with colors using RGB (Red Green Blue) function. The function requires 3 numbers from 0 to 255 [e.g. RGB(23,122,98)]. Have a look at below code:
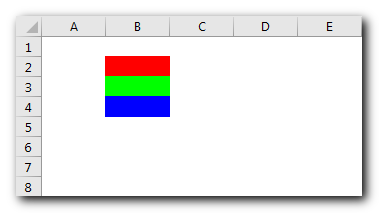
Sub RGBExample()

    Sheet1.Range("B2").Interior.Color = RGB(255, 0, 0) 'Red
    Sheet1.Range("B3").Interior.Color = RGB(0, 255, 0) 'Green
    Sheet1.Range("B4").Interior.Color = RGB(0, 0, 255) 'Blue

End Sub
Explanation:
In the above code, we are using RGB VBA function to change the cell colors.
Have a look at How to get RGB Codes of a Color and VBA Code to Change Cell Color post to know more about this.

VBA Code To Add New Sheet In VBA, it is sometime important to add a worksheet at the right place in the Excel. Here is a simple an effective code that adds a new worksheet…

How to send bulk emails from outlook using excel VBA? Have you ever felt the need of an Excel based VBA tool or code which can help you to draft Outlook emails in bulk by…
Working with huge data is always exciting and challenging. From 2007 version onward, Excel is supporting more than a million rows in each worksheet. One of the common problems with huge data is “Duplicates” and the bigger problem is to identify and remove these duplicates. In this article, we will be sharing 4 ways to delete duplicate records from your data.

VBA to Browse Outlook Folder Outlook is most commonly used emailing application used in the world. Many people spend their entire day on Outlook applications to read and respond to emails. To automate certain rule-based…

What is the Usage of sheet color in Excel? When we prepare a report or a dashboard it is easy to identify or analyze reports with a change of color sheet tabs. Analysts generally give…
Have you ever felt that Microsoft should have added a formula in Excel which can count the cells based on specific color? I have seen many code requests to share a VBA code that can count the cells by its color. To help our subscribers and developers, we are sharing 2 codes that be used to count the cells with specific color and returns the count of the matching color cells.